-->
Showing posts with label meterpreter. Show all posts

0 comments
Hi guys,
In my previous post I've mentioned how to connect to a system on a network.

Now let me share some interesting attacks.

These are just for educational purpose. Hope you will not misuse these attacks.

1. Command Prompt
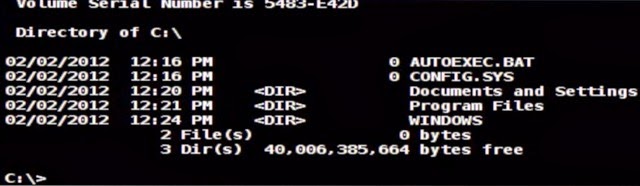

If you are familiar with command prompt then it is the most beautiful thing that you can access the system.

Right click on the host > Meterpreter1 >Interact > Command Shell

Now You are In Their Command Prompt. You can now change,rename,delete,create files on their PC now.

Visit this page for list of commands.

2. Get Screenshot
If you want to see the victims screen, you can get the screenshot of the PC
Right click on the host > Meterpreter2 > Explore > Screenshot

3.Accessing the files
If you want to browse the files on the PC in GUI mode just
Right click on the host > Meterpreter2 > Explore > Browse Files

4. Keylogger
If you want to know what the victim is typing you can do it by
Right click on the host > Meterpreter2 > Explore > Log KeyStrokes

5. Access Webcam

If you want to have fun you can access the webcam of the victim.
Right click on the host > Meterpreter2 > Explore > Webcam Shot.


Read More »

0 comments
Hi friends,
It's been long time I've posted about Meterpreter. Now lets start attacking!!!!!

Now I'll show you how to gain access to a PC using this tool. Here I'm going to use Armitage for this tutorial. If you're not sure about about the tool, visit Meterpreter Installation Guide for details.

What all do you need for this HACK?
1. Metasploit Framework
2. Oracle JAVA 1.7
3. Internet Connection.
4. The most important thing PATIENCE!!!

If you are ready with all the above then it's the time to start.

For my convenience I'm using BackTrack. If you guys want the same just download from our site.


Step 1 : Open armitage on Backtrack 5:
By Going To : Backtrack > Exploitation Tools > Network Exploitation Tools > Metasploit Framework > armitage.

Step 2 : Connect Armitage:
Click on the connect Button .

Step 3 : Connecting Armitage :
Now use the patience part,and stretch your legs,it takes some time to connect.

Step 4 :  Armitage Window :
It has 3 Panels -
Target Panel
Module Panel
Tabs Panel

Step 5 : Finding the alive host on the Network :
Now you will search for Host on you network,By Going to Hosts -> Nmap Scan -> Quick Scan (OS detect).This will perform a quick scan to detect the host and their operating systems and vulnerabilities.

Step 6 : Inputting The Scan Range :
Now You have to insert scan range,that is you LAN ip range,Most preferably it would start with 192.168.0.- or 10.0.0.-.NOTE : the ( - ) resembles the computers on LAN.
Start the Scan.

Step 7 : Scan Complete:
After the scan has completed,if their are any other PC's on your network on,then they would be visible in the Target Pane (the Big Black box on the upper right).

Step 8 : Finding Attacks :
Now the Fun Parts starts,Click on Attacks tab in your toolbar and select Find Attacks (Not hail mary,you might not be ready for that).Start the scan and wait till it completes.


Step 9 : Set the vulnerability :
Right Click on the Host icon (windows pc) -> Select attacks -> smb -> ms08_067_netapi  vulnerability .
Now a window should pop,Click on the check-box that says "Use  a reverse connection" .
Start Attack

Step 10 : The Final Result :
So did the Host Icon Turn Red ? That Means YOU PASSED!!!!!!

Once you are connected with the system, visit this page for some attacks

Read More »

0 comments
Welcome Back Viewers!!!!

Today I’m going to give a small introduction about METASPLOIT framework.

What Is Metasploit?

Metasploit is among the most widely used exploitation tools in the hacking/security field. It's used by both novices and advanced professionals. Metasploit has consistently ranked among the top ten since its inception and currently ranks second. This should give you some idea of how important Metasploit is in the security community.


Metasploit is a self-described "framework" for cyber exploitation. As a framework, it eases the effort to exploit known vulnerabilities in networks, operating systems and applications, and to develop new exploits for new or unknown vulnerabilities.

Metasploit has developed a Meterpreter that when loaded into a target system, makes maintaining access and controlling the target much easier. As such, every self-respecting hacker (and even those without self-respect) should have some basic knowledge of Metasploit. This series of articles will initially focus on conferring at least a rudimentary understanding of how Metasploit works and how it can be utilized by the hacker/penetration tester to own the box, download data and cover your tracks.

Metasploit was developed in 2003 as an open source project by H.D. Moore. Originally developed in PERL, the developer team rewrote Metasploit in Ruby in 2007. This is critical, because you need to have Ruby on your system in order to run Metasploit and to develop your own exploits.

After many years of success in the hacker/penetration tester community, it was purchased by Rapid7 in 2009. After its purchase, the Metaspoloit framework was split into three versions. Two are commercial versions; Metasploit Express and Metasploit Professional, the latter selling for $1800. These two have nice GUIs and numerous bells and whistles, including the automation of several attacks, but there is still a free and open source community edition known as the Metasploit Community.

Some independent developers at Armitage have created a free and open source GUI for Metasploit that is both beautiful and elegant, for those that prefer the point-and-click mode of operation. There is a Windows version of Metasploit, but many of the features (raw IP packet injection, wireless driver exploitation, SMB relaying attacks, etc.) are unavailable in the Windows environment, though some of these limitations can be overcome by using Cygwin or running Windows in a virtual environment on Linux. I prefer LINUX because it is the mostly used operating system by hackers.

Download and Install :

The first step in our process is to download and install Metasploit. Although there is a Windows version, I will focus on the Linux version because of its greater flexibility and capability. Let's walk through the download and installation

Download it from below links
for Windows(64-bit) users .

for Linux (32bit | 64-bit) users download here.

Now you are ready with the .exe or .run file.

Lets go further and install.

Before you can run the installer, you need to make it executable. In the terminal, you must change the mode to execute (x) for Metasploit:

chmod +x framework-4.*-linux-full.run

And now execute the installer by getting root privileges by typing sudo and ./ with the name of our package:

sudo ./framework-4.*-linux-full.run

You should then be prompted for your root password. After entering that, you should get a screen that looks something like this:


Click Forward and accept Terms & Conditions.

You can choose to install the Automatic Updates(not mandatory, but good to have it)

Here, Metasploit is asking whether you want to insert a different service script. You can just accept the default and hit Forward.


Be patient now; it will take Metasploit a few minutes to install and build your database. After it's done, you are ready to run Metasploit. Simply type:

msfconsole

Finally, you should be greeted by this screen.


You have now successfully installed the world’s best open source exploit framework and you are ready to begin system/network exploitation and penetration testing!

Keep watching for more tricks that can be performed with this tool.

Have a Good Day..!!


Read More »