-->
Showing posts with label how to. Show all posts

0 comments

You might not be aware about one thing that you can combine two internet connections to boost internet speed. I know that in some areas internet connection speed is very poor even they are not able to surf properly. But you can increase your internet speed by bonding internet connections easily. There are several methods available to connect your laptop or PC through internet such as broadband, Wi-Fi, Data dongle, Dial-Up connection and even your mobile (by creating hotspot). You can join multiple internet connections to increase your internet speed. 

As you know that you can use only one internet providing service at one time it means that if you are connected through any data dongle then you will not be able to connect through your broadband. As default windows doesn't provide any feature to add two internet connections to boost your internet speed. But don't to worry if you are reading this guide then you will be able to join them. Here we are having a great 100% working tool Connectify Dispatch. It is the best internet load balancer tool available.
WHAT IS CONNECTIFY DISPATCH?

Connectify dispatch is one of the best and easy-to-use software load balancer available in the market. It will optimize your internet connections for fastest internet connectivity. For example say your are having Wi-Fi and 4G, Two Wi-Fi adapters or DSL and 3G? then connectify dispatch will combine any of these to provide you the best internet connection. This software can combine with any of the above mentioned technologies to improve your surfing connection. 

Connectify Dispatch is a boon for those applications that downloads lots of larger files such as BitTorrent. One need high speed internet connection to download files through modern browsers and torrent clients so to solve this problem Connectify Dispatch is made available. 

Connectify Dispatch puts you in control of your internet because Dispatch meters connections so one can avoid costly overages by assigning bandwidth caps to your 3G and 4G cards. Per application settings give you control over which applications can use each internet connection.

Now you might be thinking about internet load balancer. This term might be new for you. So below is answer of it.
WHAT IS SOFTWARE LOAD BALANCER?

Software Load Balancer is an application that takes control of your internet connections. Dispatch puts each of your downloads on the best internet connection. It's easy to use, just connect to two networks, fire up Dispatch, and enjoy faster web browsing right away.

WHAT PEOPLE SAY ABOUT CONNECTIFY DISPATCH:

This is the most popular software to bind two internet connections. Lots of popular brands gave review about it.

LifeHacker
"What if you could merge your home Internet connection with the free Wi-Fi from the coffee shop down the street AND with your phone's 4G connection to create a super-pipe with tons of additional bandwidth? That's what Connectify Dispatch does, perfectly."
Engadget 
"Put all your Internets together into one big internet!"
BitTorrent
"Dispatch is especially useful for [BitTorrent users]"

PLANS AND PRICING:

Connectify dispatch comes with exciting features to offer. It comes in both free and paid version. You can easily use if as free but then you will be able to use only limited features. If you want to unlock all the features then you will need to upgrade it to its Pro version. Connectify Dispatch Pro comes with Hotspot Pro Plus which can turn your laptop or PC into a Wi-Fi hotspot. 

 Lite Version comes with following features:
  • Software Load Balancer
  • Combine Multiple Internet Connections
  • Real Time Bandwidth Monitoring
While PRO version comes with following features:
  • 3 Above mentioned feature.
  • Unlimited Dispatch Uptime
  • Application Specific Settings
  • Connection Metering
  • Interface Selection Methods
  • Automatic Startup
  • No Ads or Banners
  • Premium Support
Hotspot PRO Plus 3x Lifetime ($65)
Hotspot PRO Plus ($55)
Hotspot PRO ($40)

author-pic About author
hiiii......, this is ajay, a chemical engineer by profession, a tech geek by passion, enjoys ethical hacking


Read More »

0 comments

Note: May not work in all memory cards but surely work with 1gb cards
Sandisk 1GB SD memory card 
Wow this is really possible when i was searching for some hacking stuff online. i saw a post where people want to try whether this crack is really working or not. But they are not aware of it so they don’t want to take risk. And they didn’t even mention what the application is and from where it can be downloaded and etc. So i spent half day for searching the application here and there and finally got the crack in a small forum. So i was in a confusion that w
ill this work or not. I just cant trust it and go blindly so i scanned it in all circumstances and started to convert the card. I was shocked when i completed the process of the application. I was amazed seeing my 1 GB memory card to 2 GB and all the data can be copied according to 2GB size. So just want to give this application to all our friends.

Procedure:
1) First of all we have to make sure that its a 1 GB memory card. This only works on 1GB And it supports only in some of the rare cases of memory cards.
2) Now Backup all your data in that because we have to format the drive.
3) After backing up now open the Skimedi Fix 2GB Capacity application. i will upload a link at the end of post.
4) A small window will pop up showing the FIX and Cancel option. And you have to browse the drive where it is located (generally G: or L: drive for USB sticks)
sacn disk memorary!
5) After selecting the drive press on FIX and then the updating process will be followed up. It will ask your conformation whether you agree to format or not. click on yes.
6) Later it will ask to replug the device. Just replug the memory stick card and put it back. The size of the memory will be increased from 1Gb to 2Gb. you can see the properties before and after the cracking process.
7) After that you can also check the memory size in phone and also you can test the size by copying all the data to it which is around 2Gb.
I personally tested this and now i have converted my 1Gb to 2Gb and using 1.8 space with no problem.
scandisk 3

9) You can reopen the Skimedi Fix and select the drive again where it shows us the size as 1912mb which is nothing but 2Gb.
10) Some times we get a parameter error while copying the files which have crossed the 1Gb size so this may not be 100% successful.
Download the software here
author-pic About author
hiiii......, this is ajay, a chemical engineer by profession, a tech geek by passion, enjoys ethical hacking

Read More »

0 comments


Many guys who dont have the luxury of smartphones and have an emotion towards whatsapp search the web "Whatsapp JAR download" or "whatsapp for PC" or something else, and google will give some links and all were fake ones if the searched line is "whatsapp JAR download", because whatsapp with .ja extension is not genuine one, and also  Earlier If we want to use Whatsapp on PC then we need an emulator on which we run our Whatsapp Messenger. So now lets put an end to those unfruitful searches, and get the solution. Now you can use Whatsapp in your web browser directly without any emulator. Use of emulator was a little bit clumsy work which most of users don't prefer to do. So to solve your problem and make your work more easier Whatsapp is available in your web browser straight way. Developers have launched Whatsapp for web browser. It' now officially available on web browser. So java users can also enjoy whatsapp on your default web browser.

This Whatsapp is merely an extension which will use this process "scan QR code listed on the site with your Whatsapp to login on web". It looks really simple and easy-to-use. One can get rid from all the tips & tricks available to use Whatsapp on PC. Because this tutorial is launched officially by Whatsapp which is the most easiest method to use Whatsapp on PC or Laptop. This extension or website will let you access all your data such as chats, images, videos, location etc on your web browser like Google Chrome. but still your data will remain on your Smartphone.

Use whatsapp on web browser:

You can easily use Whatsapp on Google Chrome with this step by step tutorial, simply follow the steps given below to access Whatsapp on your Internet browser.
  • To connect your web browser to Whatsapp client, you will need to go to this URLhttps://web.whatsapp.comWhatsapp has officially made this site or extension available. 
  • Open the above listed URL in your Google Chrome browser. (Currently Whatsapp can be run in Google Chrome browser only. )
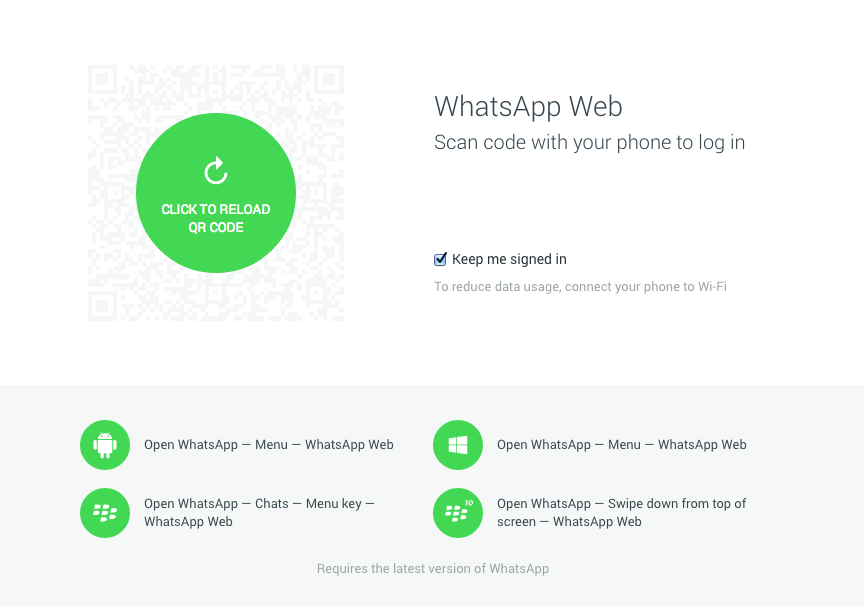
  • Now you will see a QR code there which we need to scan through our Whatsapp.
whatsapp-web-client
  • Open your Whatsapp application on your mobile and go to menu and then there you will see an option to scan this QR code through your Whatsapp. Remember scan this code only through your Whatsapp client. (Don't forget to update your Whatsapp to the latest version otherwise you won't be able to find code scanner option. If after updating also you are not able to see the option, then wait for some time. Whatsapp is trying to made it available for all the users.)
  • When the scan is completed, your Whatsapp will be paired with the Whatsapp web client. 
  • At this situation your phone needs to stay connected to the internet for the proper working of this web client.
  • Currently this web client is not available for iOS users due to some limitations of Apple platform but all other users can use it easily without any problem.
so this was all about Whatsapp web client. Whatsapp rolled out this update after the recent issue that Whatsapp punished some users on using third-party app Whatsapp Plus. Whatsapp blocked users for 24 hours for using this app. They said that they are not authorized with this app in any way. Currently you can use it on Chrome browser only. Support for other browser is coming soon.
author-pic About author
hiiii......, this is ajay, a chemical engineer by profession, a tech geek by passion, enjoys ethical hacking

Read More »

0 comments
A Virus to Block WebsitesMost of us are familiar with the virus that used to block Orkut and Youtube websites. If you are curious about creating such a virus on your own, here is how it can be done.
As usual I am using my favorite programming language ‘C’ to create thiswebsite blocking virus. I will give a brief introduction about this virus before I jump into the technical jargon.
This virus has been exclusively created in ‘C’. So, anyone with a basic knowledge of ‘C’ will be able to understand the working of this virus program. When this program is executed, it will block all those websites that are listed in the source code. In the following example, the sites that are listed in the source code are Google, Yahoo and Youtube. When you download the source code of this program, you have a choice to include your own list of sites that you want this virus to block.
I have just removed the source code of this program from this post as it is lengthy and makes the post look messy. You can still download the source code of this virus program from the following link:

How Virus Program Works?

The Windows operating system maintains a special file called HOSTS which can be used to block any given hostname or domain name (website) by adding new entries onto it. This program works by modifying the HOSTS file by adding new entries of those sites that are intended to be blocked. The HOSTS file is located at:
%windir%\system32\drivers\etc (Usually: C:\windows\system32\drivers\etc)
So, when you execute this program, all it does is add the entries of the list of those sites (mentioned in the source code) to this HOSTS file. Once this is done, the site will be blocked from your computer. So, none of the browsers would be able to load those sites on your computer.
For more information on HOSTS file, I recommend reading my other post on How to use HOSTS file to block websites.
Now, as far as the technical part of this program is concerned, people who have a working knowledge of ‘C’ should be easily able to understand the working of this virus program. However, for those who are new to ‘C’ programming, here is the algorithm of this program:
  • Determine the Root drive. ie: Find the drive (C:, D:, E: or F:) on which the Windows is installed.
  • Navigate to: %windir%\system32\drivers\etc
  • Open/Load the HOSTS file.
  • Copy a list of those websites that are mentioned in the ARRAY to the END of the file.
  • Save the file and Exit.

How to Compile the Source Code?

For a step-by-step compilation guide, refer my post: How to compile C Programs?

Testing the Virus:

  1. To test, run the compiled module. It will block the sites that are listed in the source code.
  2. Once you run the file block_Site.exe, restart your browser program. Then, type the URL of the blocked site and you’ll see the browser showing error “Page cannot displayed“.
  3. To remove the virus type the following command in the Run.
    %windir%\system32\drivers\etc
  4. There, open the file named “hosts” using the notepad. At the bottom of the opened file you’ll see something like this:
    127.0.0.1 google.com
  5. Delete all such entries which contain the names of blocked sites.
NOTE: You can also change the ICON of the virus to make it look like a legitimate program. This method is described in the post: How to Change the ICON of an EXE file?

Read More »

0 comments
How to Make a Trojan HorseMost of you may be curious to know about how to make a Trojan or Virus on your own. Well, here is an answer to your curiosity. In this, post I’ll show you how to make a simple trojan on your own using the C programming language.
This trojan when executed will eat up the hard disk space on the root drive (The drive on which the Windows is installed, usually C: Drive) of the computer on which it is run. Also, this trojan works pretty quickly and is capable of eating up approximately 1 GB of hard disk space for every minute it is run.
So, I’ll call this as Space Eater Trojan. Since this program is written using a high level programming language, it is often undetected by antivirus programs. The source code for this program is available for download at the end of this post. Let’s see how this trojan works:
Before I move on to explain the working of this program, you need to know what exactly is a Trojan horse and how it works. Unlike what many of us think, a trojan horse is not a virus. In simple words, it is just a program that appears to do a favorable task but in reality performs undisclosed malicious functions that allow the attacker to gain unauthorized access to the host machine or cause a damage to the computer.

Now let’s move on to the working of our Trojan:

The trojan horse which I have created appears itself as an antivirus program that scans the computer for malware programs. However, in reality it does nothing other than eating up the hard disk space on the root drive by filling it up with a huge junk file. The rate at which it fills up the hard disk space it too high. As a result, the the root drive gets filled up completely with in minutes of running this program.
Once the disk space is full, the trojan reports that the scan is complete. The victim will not be able to clean up the hard disk space using any of the cleanup program. This is because, the trojan intelligently creates a huge file in the Windows\System32 folder with the .dll extension. Since the junk file has the .dllextension it is often ignored by the disk cleanup software. Hence there is now way to recover the hard disk space other than reformatting the drive.

The algorithm of the Trojan is as follows:

  1. Search for the root drive.
  2. Navigate to %systemroot%\Windows\System32 on the root drive.
  3. Create the file named “spceshot.dll“.
  4. Start dumping the junk data onto the above file and keep increasing its size until the drive is full.
  5. Once the drive is full, stop the process.
You can download the Trojan source code HERE. Please note that I have not included the executable for security reasons. You need to compile it to obtain the executable.

How to compile the program?

For step-by-step compilation guide, refer my post How to compile C Programs.

How to test this trojan horse?

To test the trojan, just run the SpaceEater.exe file on your computer. It will generate a warning message at the beginning. Once you accept it, the Trojan runs and eats up the hard disk space.
NOTE: To remove the warning message you’ve to edit the source code and then re-compile it.

How to fix the damage and free up the space?

To remove the damage and free up the space, just type the following in the “run” dialog box:
%systemroot%\system32
Now search for the file “spceshot.dll“. Just delete it and you’re done. No need to re-format the hard disk.
 NOTE: You can also change the ICON of the virus to make it look like a legitimate program. This method is described in the post: How to Change the ICON of an EXE file ?
Please pass your comments and tell me your opinion. I am just waiting for your comments. :)

Read More »